
How to Fix Oil Stains on Driveway: Step-by-Step
Updated: 6 days ago
Table of Contents
Why Oil Stains on Your Driveway Need Prompt Action
Immediate Response: Dealing with Wet Oil Spills
Best Driveway Degreaser UK: Household vs. Commercial Solutions
DIY Household Methods
Commercial Degreasers and Solvents
How to Clean Oil Off Block Paving: Surface-Specific Techniques
Removing Dried and Set-In Oil Stains
Tools, Safety, and Environmental Disposal
Essential Equipment and Protective Gear
Safe Disposal and Environmental Guidelines
Driveway Cleaning Services Cost: When to Call a Professional
Preventing Future Oil Stains: Maintenance and Sealing
Frequently Asked Questions
Last Updated: September 4, 2026
An oil stain on a driveway is one of the most common eyesores for UK homeowners, and learning how to fix oil stains on driveway surfaces properly can save you from costly replacement work. At SavingPaving, we have spent decades restoring driveways across London and the South East, and we know that the right approach depends entirely on the surface you are working with and how quickly you act. Below, we will show you exactly how to tackle fresh spills and set-in stains, with practical steps you can apply today.
The key principle to remember is that oil acts quickly. The longer it sits on a porous surface like concrete, tarmac, or block paving, the deeper it penetrates and the harder it becomes to remove. Acting within the first few hours gives you the best chance of lifting the stain completely, while older marks require a more patient, chemical-based approach.
Why Oil Stains on Your Driveway Need Prompt Action
Oil does more than ruin the look of your driveway. On porous surfaces, the oil soaks below the surface layer where it can weaken the binder that holds tarmac together or leave permanent dark patches on concrete and block paving that no amount of standard cleaning will shift.
There is also a safety angle to consider. A wet oil patch becomes slippery when it rains, creating a hazard for anyone walking across the drive. For elderly homeowners or families with young children, that slip risk is a genuine concern that warrants prompt attention.
Beyond the practical issues, an oil-stained driveway drags down the appearance of your whole property. If you are preparing your home for sale, stained paving is one of the first things potential buyers notice, and it can undermine the curb appeal of an otherwise well-presented property.
Immediate Response: Dealing with Wet Oil Spills
When oil has just spilled, your priority is absorption. Acting quickly prevents the oil from penetrating deeper into the surface, so grab an absorbent material before you reach for any cleaning products.
The most effective household absorbents are cat litter, clay-based products, cornstarch, or even sawdust. Generously cover the entire spill, going slightly beyond the edges, and press the material down gently so it can soak up the oil. Leave it for several hours or overnight if possible. The longer the dwell time, the more oil the absorbent will pull from the surface.
Once the absorbent has done its work, sweep it up and dispose of it responsibly. Oil-soaked material should not go in your regular household waste bin, as it can be classed as hazardous waste. Check with your local council for guidance on disposing of oil-contaminated materials.
For the residue that remains, a degreaser combined with hot water and a stiff-bristle brush will usually finish the job. Apply the degreaser, let it sit for the recommended dwell time, then scrub vigorously before rinsing clean.
Best Driveway Degreaser UK: Household vs. Commercial Solutions
The phrase "best driveway degreaser UK" covers two distinct categories: household solutions you can make yourself and commercial products designed for tougher jobs. Your choice depends on the age of the stain and the surface you are cleaning.
DIY Household Methods
For fresh or light stains, household products often work surprisingly well. Dish soap is a mild surfactant that can break down surface oil, especially when mixed with hot water. Baking soda makes a gentle abrasive paste that helps lift residue without damaging the paving.
Many homeowners also find that a solution of warm water and washing-up liquid, applied with a stiff-bristle brush, handles light oil marks on concrete and block paving effectively. These methods are cheap, readily available, and safe for surrounding plants and lawns, which makes them an appealing first attempt.
Commercial Degreasers and Solvents
When household methods fail, commercial degreasers become necessary. Solvent-based degreasers, such as those containing white spirit, are effective on stubborn, set-in stains but require careful handling due to their fumes and flammability.
Water-based degreasers are a safer alternative for most driveway surfaces. They emulsify the oil, allowing it to be rinsed away with water rather than simply dissolved. Look for products specifically formulated for porous outdoor surfaces rather than garage floors, as driveway-specific formulas account for the different absorption rates of concrete, tarmac, and block paving.
For heavily stained block paving, a dedicated block paving cleaner or degreaser is often the most reliable option, as these are designed to penetrate the jointing sand and clean the individual blocks without damaging the pointing.
How to Clean Oil Off Block Paving: Surface-Specific Techniques
Block paving requires a different approach than concrete or tarmac because the oil seeps not only into the blocks themselves but also into the sand joints between them. If you are wondering how to clean oil off block paving effectively, the answer lies in treating both the blocks and the joints.
Start by removing any loose debris from the joints, as this sand will have absorbed oil and needs to be replaced. A stiff brush or a narrow tool can help you lift out the contaminated sand. Once the joints are clear, apply a degreaser directly to the stained blocks and work it in with a stiff-bristle brush.
Allow the degreaser to sit for the recommended dwell time, then rinse thoroughly with clean water. You may need to repeat the process for older stains. After the area dries, you should replace the sand in the joints and consider applying a sealer to protect the blocks from future oil penetration.
Concrete and tarmac are more forgiving than block paving, but they still require care. Concrete is highly porous, so oil penetrates quickly, while tarmac can be damaged by aggressive scrubbing or harsh chemicals that break down the bitumen binder. Always test any cleaning product on a small, inconspicuous area first to check for adverse reactions.
Watch Out Never use a pressure washer or jet wash on a fresh oil stain. The high-pressure water forces the oil deeper into the surface, making the stain significantly harder to remove. This is a common mistake that many homeowners make, and it often turns a manageable spill into a permanent mark.
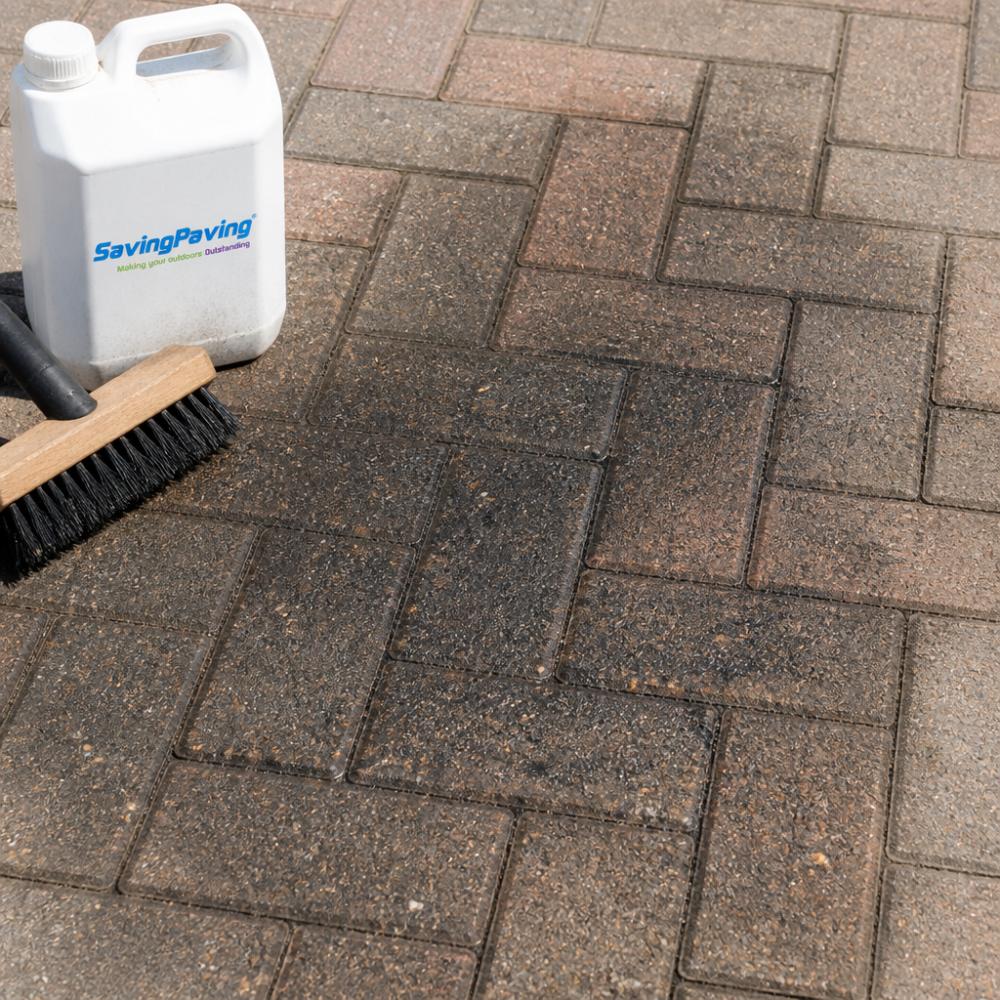
Removing Dried and Set-In Oil Stains
Dried oil stains are a different challenge entirely. The oil has had time to oxidise and bond with the surface, so simple degreasers may not be enough. This is where a more methodical approach pays off.
Begin by applying a solvent-based degreaser or white spirit directly to the stain. Cover the area with a plastic sheet to slow evaporation, which increases the dwell time and gives the solvent longer to break down the oil. Leave it for several hours or overnight.
After the solvent has worked, scrub the area with a stiff-bristle brush and rinse with hot water. For stains that remain, you may need to repeat the process or step up to a stronger commercial product designed for heavy oil removal.
For the most stubborn set-in stains on block paving, the contaminated sand in the joints may need to be removed and replaced entirely. In some cases, individual blocks may be so deeply stained that they need to be lifted and cleaned from underneath, which is where professional help becomes worthwhile.
Pro Tip For deep-set oil stains on concrete, try making a poultice from baking soda and water. Apply it thickly over the stain, cover with plastic, and leave it to dry for 24 to 48 hours. The poultice draws the oil out of the surface as it dries, and you can brush away the residue afterwards.
Tools, Safety, and Environmental Disposal
Having the right tools makes the job significantly easier. A stiff-bristle brush is essential for working degreasers into the surface, while a standard garden hose provides the rinse water you need. For larger areas, a pressure washer or jet wash can be useful after the degreaser has done its work, but avoid using it on fresh spills.
Essential Equipment and Protective Gear
Before you start, gather the following:
Stiff-bristle brush (nylon for block paving, wire for concrete if needed)
Absorbent material (cat litter, clay-based products, or cornstarch)
Degreaser appropriate for your surface type
Protective gloves to shield your hands from chemicals
Safety glasses to protect your eyes from splashes
Old clothing that you do not mind getting stained
Solvent-based products give off strong fumes, so work in a well-ventilated area and avoid using them near open flames or ignition sources. Always read the manufacturer's instructions before use and follow the recommended safety precautions.
Safe Disposal and Environmental Guidelines
The disposal of oil-contaminated materials is governed by environmental regulations, and getting this wrong can result in fines. Never pour oil, degreasers, or contaminated rinse water down a drain or storm gutter, as this pollutes local waterways and can harm wildlife.
Oil-soaked absorbents and rags should be sealed in a bag and taken to your local household waste recycling centre, where they can be disposed of as hazardous waste. Many councils offer specific guidance on disposing of oil and chemical products, so check their website or contact them directly for advice.
If you are unsure about the correct disposal method, err on the side of caution and treat the materials as hazardous. It is better to make an extra trip to the recycling centre than to risk contaminating your local environment.
Driveway Cleaning Services Cost: When to Call a Professional
When DIY methods fail or the stain covers a large area, professional help is often the most cost-effective solution. The driveway cleaning services cost varies depending on the size of your driveway, the type of surface, and the severity of the staining, but professional treatment can be a cost-effective alternative to replacing stained paving.
At SavingPaving, we specialise in stain removal across London and the South East, including Kent, Surrey, Essex, Sussex, and areas like South Croydon and Bromley. Our team of uniformed, insured professionals has been restoring driveways since 2001, and we use effective, non-damaging processes that are safe for your paving, plants, fences, windows, and lawns.
One common concern we hear from homeowners is about pressure washing stripes left by previous attempts. Our cleaning process is designed to deliver a stripe-free, deep clean finish without the damage that DIY jet washing can cause. We also offer free site surveys and are happy to answer any detailed questions you have before we begin work.
When you contact us through the contact form on our website, we will assess your driveway and provide a clear quote with no hidden costs. If we discover something unexpected during the job, we will discuss it with you before proceeding, so there are never any surprise charges. Sealing and maintenance options are also available to protect your driveway after cleaning.
Preventing Future Oil Stains: Maintenance and Sealing
The best way to fix oil stains on driveway surfaces is to prevent them from happening in the first place. Regular maintenance and a good quality sealer can make a significant difference to how your driveway copes with spills.
Sealing your driveway creates a protective barrier that stops oil from penetrating the surface. On block paving, sealing also helps to stabilise the jointing sand, reducing the risk of it washing away or absorbing contaminants. A sealed driveway is easier to clean and more resistant to staining, moss, and algae growth.
For vehicles, using a drip tray or an oil pan under the engine when parking for extended periods can catch leaks before they reach the paving. Regularly checking your vehicle for oil leaks and addressing them promptly is another simple step that protects your driveway.
If you notice a small oil spot forming, deal with it immediately using the absorbent method described earlier. A few minutes of attention now can save you hours of scrubbing later, and it keeps your driveway looking its best for years to come.
Key Takeaway Prompt action with absorbent materials is the single most effective way to prevent permanent oil stains. For stains that have already set in, [professional cleaning from an experienced team](/cleaning) like SavingPaving offers the most reliable and cost-effective solution, especially when combined with sealing to protect your driveway going forward.
Oil stains are a frustrating problem, but they do not have to mean the end of your driveway's appearance. By acting quickly on fresh spills and using the right techniques for set-in stains, you can keep your paving looking clean and well-maintained. When the job is beyond DIY methods, the team at SavingPaving is here to help with free site surveys, expert advice, and professional stain removal that restores your driveway to its former glory. Get in touch through our website's contact form to discuss your driveway cleaning needs.
Frequently Asked Questions
Is it possible to get oil stains off a driveway?
Yes, oil stains can be removed from driveways, though success depends on how long the stain has been present and the driveway material. Fresh spills respond well to absorbent materials and household degreasers. Set-in stains require stronger commercial degreasers, scrubbing, or pressure washing. Concrete and tarmac surfaces respond differently to treatment, so surface-specific techniques matter. For stubborn stains that resist DIY methods, professional driveway cleaning services can remove them effectively without damaging the underlying surface.
What is the best degreaser for concrete driveways?
The best driveway degreaser depends on stain age and severity. For fresh spills, dish soap mixed with hot water and baking soda works well. For set-in stains, commercial degreasers containing surfactants that emulsify oil are more effective. White spirit is a solvent option for stubborn residue, though it requires careful handling. Enzyme-based degreasers offer an environmentally friendlier alternative. Always test any degreaser on a small, inconspicuous area first to ensure it won't damage or discolour your concrete.
How long does it take to remove oil stains from a driveway?
Fresh oil spills can be addressed within hours of application using absorbent materials and household cleaners. Dried stains typically require 24-48 hours of treatment, including dwell time for degreasers to penetrate the porous surface. Pressure washing or jet wash can speed up removal but risks surface damage if not done correctly. Very old, set-in stains may need multiple treatments over several days. Professional services can often complete removal in a single visit, depending on stain severity and driveway condition.
Can pressure washing damage my driveway?
Yes, pressure washing can cause damage if not performed correctly. High-pressure jets can erode concrete, strip sealant, and leave visible stripe patterns across the surface. Tarmac and asphalt are particularly vulnerable to pressure washing damage. Block paving can be displaced or cracked by excessive pressure. This is why professional driveway cleaning services use appropriate pressure settings and techniques tailored to your specific surface material. If you attempt pressure washing yourself, use lower pressure settings and test on a hidden area first.
Learn more
This article was written using GrandRanker